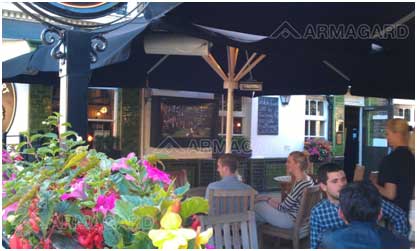
LCD enclosures are a highly cost effective method of using screens in outdoor environments and areas where unprotected screens could be vulnerable to breakdown. From digital signage and information screens to computer monitors and TV displays, LCD enclosures provide an unrivaled return on investment compared to comparable forms of outdoor and rugged display systems.
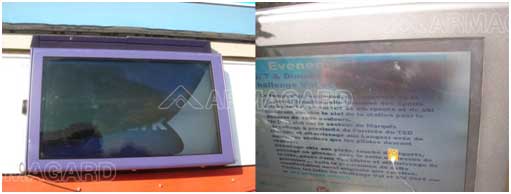
Due to the quality of the engineering and materials that go into the construction of an LCD enclosure, these protective housings for displays can last for years, often housing generation after generation of screen. However, incorrect LCD enclosure and Digital Signage installation, improper use and lack of maintenance could reduce its effectiveness and lead to premature failure of the protected device.
LCD Enclosure and Digital Signage Installation
Correct and proper LCD enclosure installation is perhaps the most fundamentally important thing that will ensure the long life of the equipment and the protection it provides to the display device. An inadequately installed enclosure or one that is mounted incorrectly could lead to all sorts of problems, from overheating of the display due to poor ventilation to an enclosure potentially falling from its mounts leading to damage to both the enclosure and display (and possibly causing injury).

All guidelines for this digital signage installation should be followed precisely, and bolts, nuts, gland plates, brackets and other installation items should be the right size and type for the installation. Furthermore, the correct tools should be used when installing an LCD enclosure and health and safety guidelines should also be followed as LCD enclosures are heavy and could cause injury.
Location
Enclosure installation in the correct location is essential to ensure the enclosed display is being protected adequately. Furthermore, installation in the wrong location could lead to a failing bracket or mounting system. Therefore, it is important to assess any installation point and make sure it can withhold the weight of an enclosure. False ceilings and plasterboard walls, for instance, are not suitable as they may not be able to take the weight of the enclosure and display device.
An LCD enclosure needs also to be placed in a location where enough air can get into its ventilation system. Obstructions near to the enclosure could block the enclosure vents, causing the overheating of any enclosed device, so a wall needs to be clear of anything that might impinge on the operation of the enclosure, and the enclosure should be sited in a position where there is enough space to enable adequate air circulation.

Preparation
When preparing for installation of an LCD enclosure, the power should be turned off and not turned on until the enclosure has been fully assembled and is ready to use. When installing the outdoor monitor enclosure, do not attempt any installation during bad weather or in poor lighting as this could make the installation dangerous or more difficult.
Enclosures vary in size, and therefore can be quite heavy. Don’t attempt an installation on your own, especially with the large sized enclosures, which may require 2-3 people to lift. Furthermore, don’t attempt to mount an LCD enclosure with the screen already inside, as this not only adds to the weight but could lead to damage to the display.
Display and cabling
Before mounting any enclosure, the cabling for any media player and display should be fitted inside the enclosure with the leads placed through the gland plate at the back of the enclosure, which will maintain a water tight seal. Once the cables have been fed through, the gland plate should be sealed by using either open or closed grommets to fill the holes. Furthermore, all cables should feed into the gland plate from below, as cables from above can result in water dripping into the gland plate.
Brackets to secure the display to the inside of the LCD enclosure should ideally be placed with the centre hole of the bracket at the halfway line of the display. This will ensure a perfectly balanced unit. To do this, the display should be placed face first on a flat surface, ensuring the screen is protected to prevent scratches. A measuring tape should be used to determine the halfway line and the brackets secured using the relevant screws.
While the display should not be secured inside the enclosure until it has been wall or ceiling mounted, it is worth checking the fit of the display to ensure there is enough room. The display should be lowered inside the enclosure and mounted on the interior mounting plate. If the enclosure is fitted with an air curtain, there should be a 15 mm gap between it and the enclosure window, any less and the flow of air could be impinged. If necessary, the display should be raised or lowered depending on the display thickness by adjusting the mounting bracket or using additional bolts and washers.
Wall mounting
As with the installation of the display, the center hole of the LCD enclosure bracket should be at the halfway line of the unit for perfect balance. The mounting brackets should then be secured with the relevant bolts to the back of the enclosure. Only recommended brackets should be used to mount the enclosure. Furthermore, never drill any holes into the enclosure or break the surface in any way as this will not only reduce its ingress rating, but also will void any warranty.
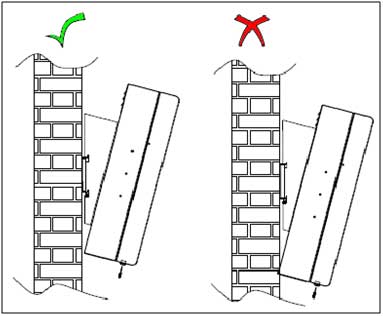
The wall plate should be secured using bolts long and strong enough to withhold the weight of the enclosure and the display should be positioned in a location where the enclosure will get adequate enough air circulation. Once the wall plate is affixed to the wall, the enclosure can then be mounted. This should be done gently and carefully, making sure the enclosure brackets are slotted over the wall plate’s top lip and that the enclosure doesn’t touch the wall. It may be necessary to re-position the enclosure’s brackets to ensure there is enough room.

Finally to prevent the enclosure being stolen by thieves, the enclosure must be secured to the wall using the locking bar. The locking bar is a long steel bar that will vary in size between enclosure models, and must be placed through the wall bracket and mounting bars and then pad locked to prevent anyone from removing the enclosure.
Finalising set up
Once the enclosure has been wall mounted, check the fixtures thoroughly to ensure there is no give in the mounting. Once confident the enclosure and wall mount are secure and can take the weight, insert the display and any media player you wish to use. Once installed, insert all cables into the display and media player, double check they are secure, and then close the enclosure and power up. The LCD enclosure has a locking bar to provide security. To ensure nobody can tamper with the display, place the locking bar across and secure it with a padlock.
Thermostat set up
One aspect of an LCD enclosure that is integral to prolong the life of a display is to ensure the correct internal temperature is maintained at all times. To maintain a steady internal temperature each enclosure is fitted with thermostats, but these should be correctly set up at the right temperature. While the required temperature for each display may differ, depending on environmental factors and the amount of heat given off by various different display types, a good recommendation is 25 degrees centigrade (77 degrees Fahrenheit) for cooling and 10 degrees centigrade (50 degrees Fahrenheit) for heating.
To set up the thermostat, simply remove the display and manually adjust the thermostat dials to the desired temperature. Once the internal heat reaches the maximum level as set by the cooling thermostat, the internal fans should activate until the temperature drops.
Screen cleaning
To maintain clarity of the display the screen face should be regularly cleaned. Cleaning methods will depend on the type of screen covering. For glass screens, hot soapy water should be used to remove dirt and debris, which should be rinsed thoroughly and wiped with a clean cloth to remove smears. Alternatively, you can use off-the-shelf glass cleaning detergents.
For poly-carbonate screens, water should not be too hot and only a mild soap should be used and the screen should be cleaned with a soft, clean sponge. While the screen can be cleaned with a steam or pressure washer, avoid detergents that are not compatible with cleaning poly-carbonate. Furthermore, avoid using anything abrasive that could scratch the surface of the poly-carbonate, including squeegees and scourers, and never scrape the surface to remove debris.
Maintenance
If an Armagard LCD enclosure has been installed and set up correctly, it should last for years without problems. However, the enclosure will still require regular maintenance to ensure it continues operating in perfect order. As mentioned above, the ventilation system on an LCD enclosure should be free from any blockages and obstructions. Furthermore, the fan filters should be checked least every six months, and any bug screens should be cleaned and fan filters should be replaced with clean fan filter pads.
The enclosure’s integrity should also be checked regularly, making sure there has been damage to brackets or movement in the mounting caused by accidents or adverse weather. Furthermore, all bolts, locking bars and screws should be checked to ensure they are still secure and have not been tampered with.
NOTE: For a correct installation, individuals must always refer to the manual provided with the enclosure for up-to date guidelines and instructions.


Comments are closed.